Easy Tips on How to Restore Headlights
Restoring headlights doesn't have to be complicated. Start by checking for haze or discoloration on the lens surface. Mix warm water with mild soap and scrub gently using a microfiber cloth. For tough stains, a baking soda paste works wonders. Polish in circles with a compound, using a dual-action polisher for stubborn spots. Apply UV sealant to protect from oxidation. Regular upkeep ensures longevity, and if you prefer professional assistance, specialized car detailing services in Grovetown, GA can handle the restoration process for you. Clear and brighter headlights are just a few simple steps away.
Importance of Headlight Restoration
Restoring headlights is essential for improving visibility on the road and ensuring the safety of both yourself and other drivers. Over time, headlights can become cloudy, yellowed, or hazy due to UV exposure, oxidation, and environmental factors. This deterioration can significantly diminish the effectiveness of your headlights, leading to reduced visibility during nighttime driving or adverse weather conditions. By restoring your headlights, you enhance the light output, brightness, and coverage, allowing you to see further ahead and react promptly to potential hazards. Clear headlights also make your vehicle more visible to other drivers, reducing the risk of accidents. Properly restored headlights not only enhance the aesthetics of your vehicle but also play a critical role in promoting road safety.
Assessing Headlight Condition
To properly assess the condition of your headlights, start by closely examining the surface for signs of cloudiness, yellowing, or haziness that may impact their performance on the road. Check for a hazy or misty appearance that suggests oxidation has begun affecting the lens. Look for a yellow or discolored hue that indicates prolonged UV exposure and weathering. Inspect for any surface scratches or pitting that could scatter light and reduce beam effectiveness. Note any areas where the clear coat may be peeling or damaged, as this exposes the underlying plastic to further deterioration. These factors can affect the brightness and effectiveness of your headlights, reducing visibility on the road. Understanding the current state of your headlights is crucial before proceeding with any restoration process. By identifying these issues early on, you can address them promptly and ensure optimal performance from your headlights.
DIY Headlight Cleaning Solutions
Having the necessary materials and tools readily available makes the cleaning process straightforward. To effectively clean your headlights, start by mixing a solution of warm water and mild soap. Using a clean microfiber cloth, gently scrub the headlight lens in a circular motion to remove any dirt or grime buildup. For more stubborn stains or oxidation, you can create a paste using baking soda and water. Apply the paste to the headlight lens and let it sit for a few minutes before scrubbing it off with the microfiber cloth. Rinse the headlight lens thoroughly with clean water and dry it off to reveal a clear and restored surface. This basic cleaning approach often removes surface-level contamination and can significantly improve headlight clarity without specialized products.
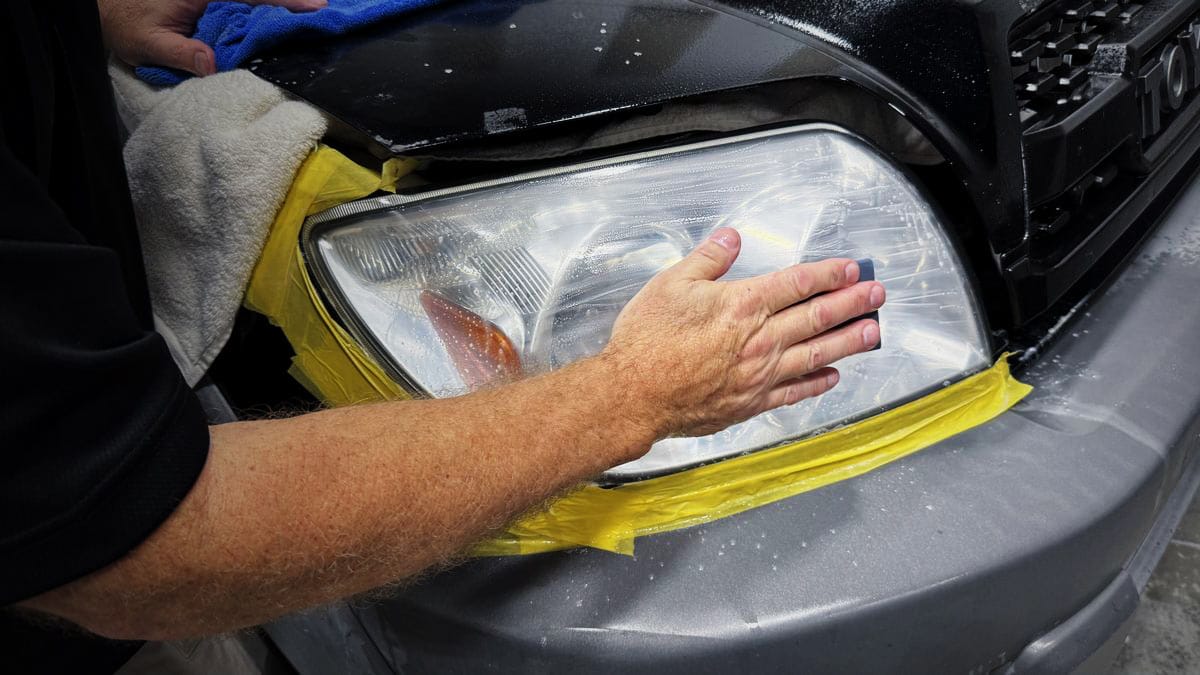
Polishing and Buffing Techniques
Utilizing a high-quality headlight polishing compound effectively restores clarity and shine to your headlights. To achieve the best results, apply the polishing compound using a clean microfiber cloth in small circular motions, ensuring even distribution across the lens surface. For more persistent oxidation, use a dual-action polisher with a foam pad to achieve deeper restoration and smoother results. Work on one section of the headlight at a time to ensure thorough coverage and consistent polishing across the entire surface. Check your progress frequently to prevent over-buffing, which can lead to hazing or damage to the lens. The polishing process removes the oxidized layer and smooths out surface imperfections, restoring the optical clarity needed for proper light transmission. Patience and attention to detail during this stage will yield professional-looking results.
UV Protective Sealant Application
For optimal protection against UV damage and environmental elements, applying a high-quality UV protective sealant to your headlights is necessary. UV protective sealants act as a barrier, shielding the headlights from damaging UV rays, oxidation, and other factors that can lead to discoloration and damage. Ensure the headlights are clean and dry before application. Using a clean microfiber cloth, apply the UV sealant in small, circular motions, covering the entire headlight surface evenly. Allow the sealant to cure as per the manufacturer's instructions, usually around 24 hours. Once cured, gently buff off any excess sealant residue to reveal a clear, protective layer. Regularly reapply the sealant every few months for optimal protection and longevity of your headlights. This protective coating is what prevents your restoration work from degrading quickly and keeps your headlights clear for extended periods.
Maintenance Tips for Longevity
To maintain the protective layer of the UV sealant and ensure the longevity of your headlights, incorporating regular cleaning practices is imperative. Regular washing with mild car wash soap and water keeps surface contaminants from bonding to the lens and degrading the protective coating. Avoid abrasive cleaners or harsh chemicals that can damage the UV sealant and compromise the protection you've worked hard to establish. Periodically reapply UV sealant every few months to maintain its protective properties and prevent oxidation from returning. Protect your headlights from excessive sun exposure by parking in shaded areas or using a car cover when possible, as prolonged UV exposure accelerates the deterioration process even with protective sealant in place. These simple habits will keep your headlights clear and functioning optimally for years.
Related Topics: